🗺 Where is Navarro? (map directions)
Navarro sits fifteen squares due south of Arroyo, on the far west coast. Arroyo is already pinned to the northwest edge of the world map, so the trip is essentially straight down — hug the left (western) coastline and keep heading south. No meaningful left/right drift; if you slide west you hit ocean, if you drift too far east you leave the coast road.
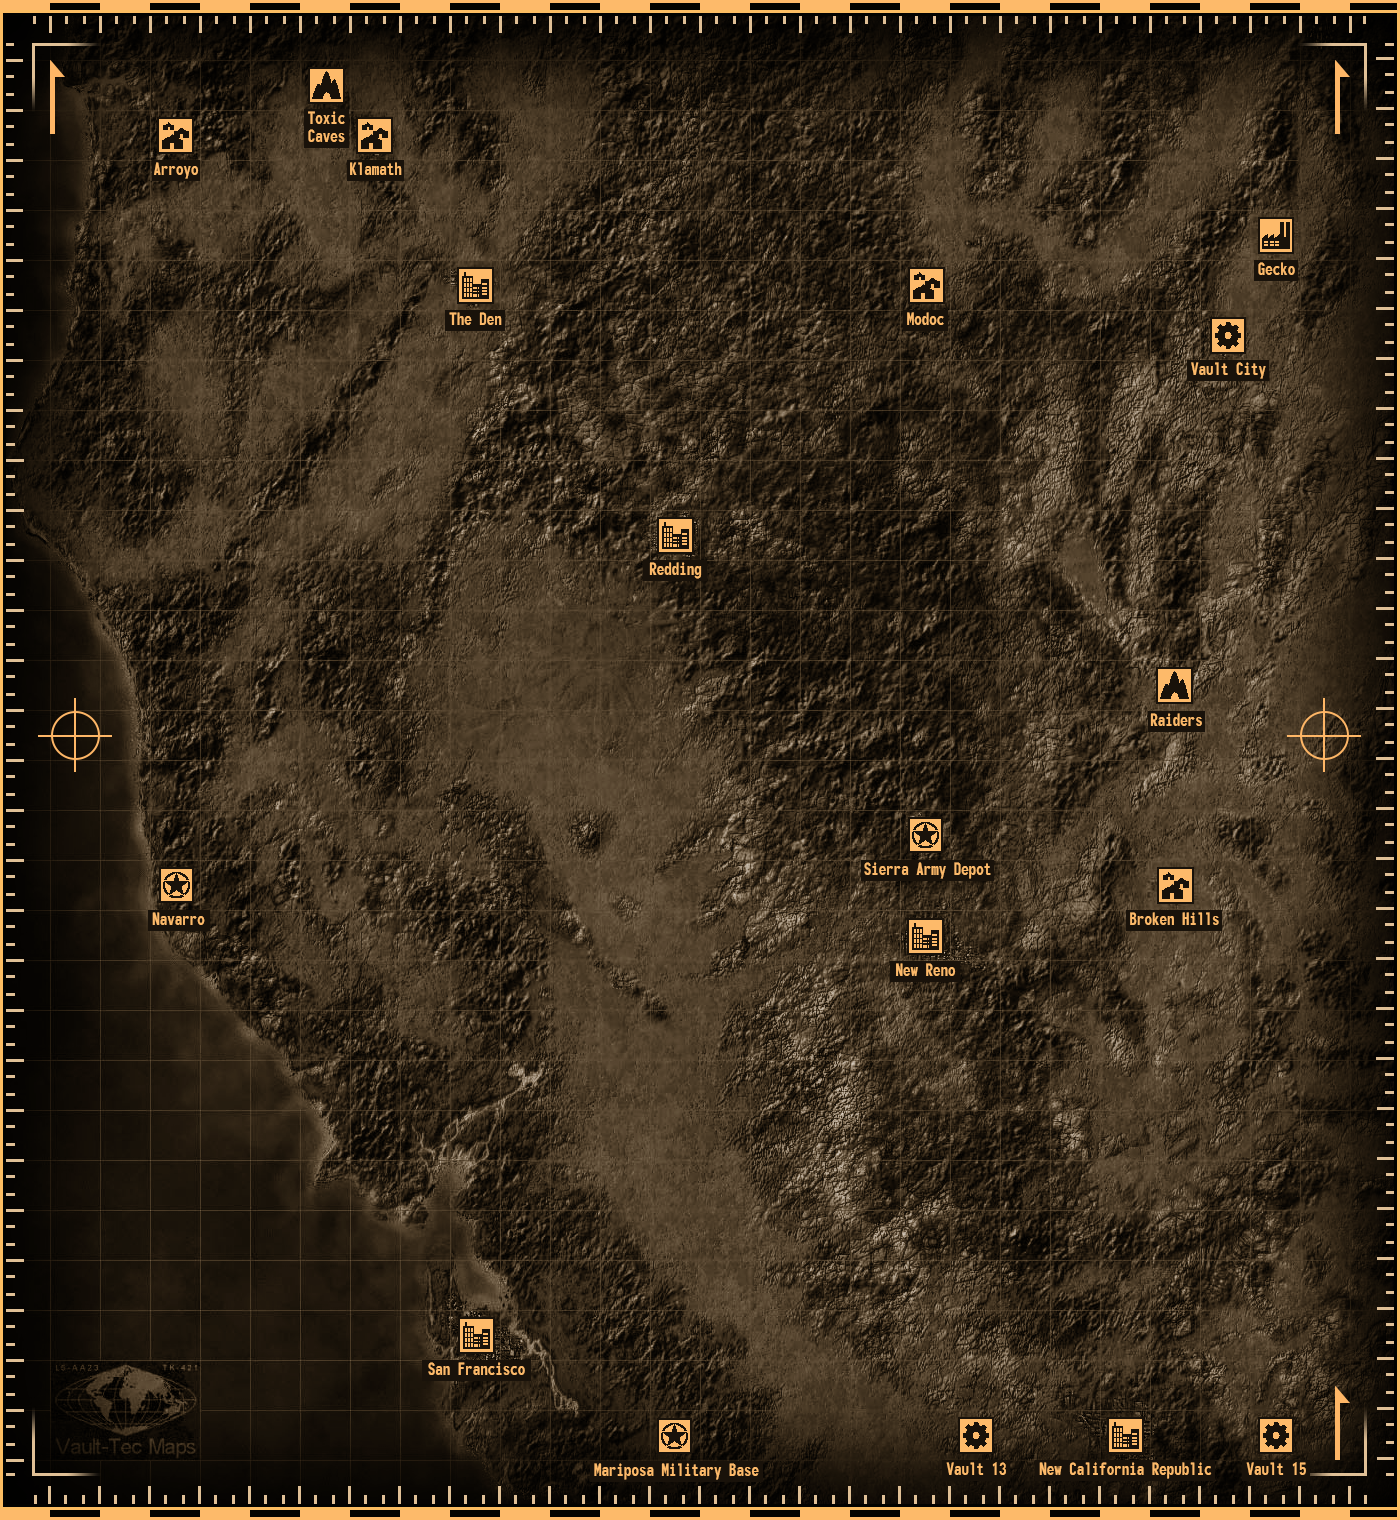
The Fallout 2 world map (local copy). Arroyo sits top-left; Navarro is on the west coast to the south. The schematic below shows the straight-south line.
⚠ Step 0 — reveal Navarro first (mandatory)
This is the bit that traps everyone — including an earlier version of this guide. Navarro is a small "base"-size location, and the game does not place it on the world map until a quest reveals it. Walking onto the empty tile does nothing. There is no workaround; you must trigger the reveal once.
Fastest reveal — Matthew (Brotherhood of Steel), San Francisco. He stands out in the open on the SW side of SF's Chinatown. Talk to him and accept "Get the vertibird plans" — no faction to join, no prerequisite, no combat, no skill check. The instant you accept, Navarro appears 15 squares south of Arroyo. (The Shi's Ken Lee gives the same quest as a backup; the Hubologists' version makes you join first, so it's slower. Bonus: handing the plans back to the Brotherhood later is worth ~20,000 XP + the Pulse Rifle.)
Reaching San Francisco is the easy part. SF is a big "town"-size location, so its green circle appears on its own as soon as you travel down to the south-west coast — you do not discover it through a chain of towns. Just head south / south-east from Arroyo to the coast, dodging encounters with your maxed Outdoorsman, and SF shows up. No car needed; the whole trip is doable at level 1–3 with almost no forced combat — the only real threat is the random Enclave patrols you're avoiding.
⚑ Before you leave: character readiness
Full sheet on The Ghost stat page. Quick check before the trek:
- Traits: Gifted + Small Frame • SPECIAL ST 4 / PE 6 / EN 8 / CH 2 / IN 10 / AG 10 / LK 8
- Tag skills: Outdoorsman Sneak Steal
- Target before heading south: Outdoorsman as high as possible (90%+ ideal), Sneak ~80%+. Take Survivalist (+25% Outdoorsman) at level 3.
- Melee weapon in hand: Sharpened Spear (Arroyo) and/or Spiked/Brass Knuckles — Navarro has none to loot (see the loot section).
- Consumables: Stimpaks, Healing Powder, a few Rad-X; rubber boots if you dip into the Toxic Caves.
🏠 Village-by-village prep
1 • Temple of Trials
- Save constantly — before scorpion packs, before disarming traps, before Cameron.
- An Unarmed/Melee character clears this easily. Grab the spear and any loot.
- Cameron (final test) — talk him down (IN 4+ and Speech tagged) or steal his key for 600 XP, or fight unarmed for 300 XP.
- Skip his training: Cameron's +10% Unarmed/Melee needs AG ≤ 6 and no combat skill tagged — this AG 10 build doesn't qualify, and doesn't need it (Unarmed reaches 80% via the Klamath/Sierra/New Reno/SF trainers for free).
2 • Arroyo
- Talk to the Elder for your quests, Vic's Water Flask, and $152 (only if Intelligence ≥ 4 — you have 10, so you're fine).
- Sharpen your spear: ask Mynoc at the bridge about his spear (needs PE 6 — you have 6) → he sends you for Flint. Get it from aunt Morlis for 3 Healing Powder (or barter/Speech). Tip: drop all your spears first, then Mynoc hands you a fresh one and sharpens it — you end up with two. The Sharpened Spear is a solid early melee weapon.
- Hakunin heals you to full and cures poison for free, any time — as long as your karma isn't negative. Do not use Steal on the wandering villagers (even a successful check with nothing taken tanks karma and can lock you out of Hakunin's heals).
- Free XP/cash: fix Feargus's well (Repair, 100 XP, works at any skill), grab the $100 in aunt Morlis' hut, and clear Hakunin's garden plants / find Nagor's dog Smoke.
3 • Klamath — the key stop
- Scout Handbook — a kid in Trapper Town (east Klamath) carries one. Steal it (no penalty even if caught) and read it early to bump Outdoorsman — books stop helping once the skill passes ~91%, so don't wait.
- Grind a few levels on rats, geckos and scorpions so your tagged Outdoorsman & Sneak skill-points land and you hit level 3 for Survivalist. Dump points: Outdoorsman first, Sneak second.
- Pick up cheap Brass / Spiked Knuckles from local merchants as your unarmed sidearm.
- Optional companion: Sulik is great melee muscle, but a low-level companion trips encounters and dies to patrols — skip him for the stealth rush (recruit later).
4 • Optional detours (skip for pure speed)
| Place | Why you might stop | Verdict for the rush |
|---|---|---|
| Toxic caves (N of Klamath) | Gecko XP + Gecko Skinning cash (rescue Smiley). Needs rubber boots for the sludge. The deep bunker is late-game (50 Lockpick / 60 Repair) — no early Power Fist here. | Optional XP/cash |
| The Den | Buy Stimpaks/Super Stimpaks, maybe a Power Fist from a merchant; free Vic for Repair. | Optional supplies |
| Gecko | Blue Pass Key in the power plant (shelf by the yellow key). | Skip — the trap door needs no key |
☠ The trek south — dodging Enclave patrols
- With Outdoorsman high, most world-map encounters auto-avoid. Save before every leg.
- If a patrol or deathclaw loads anyway, do not fight — run to the encounter-map edge and exit (AG 10 gives you the movement). Cautious Nature makes enemies spawn farther, buying escape room.
- Travel is faster (fewer encounter rolls) with the Highwayman car and along roads — both optional.
🔐 Navarro — the heist, precisely
- At the gas station, defuse Chris. Tell him you're "just looking around" and he lets you pass. Do NOT ask about the Brotherhood or vertibird plans, and do NOT bring party members — either makes him suspicious. If he turns hostile, kill him fast before he alerts the base.
- Take the trap door. Inside the shed behind Chris is a trap door straight to the underground — the easiest entrance, and it needs no Blue Pass Key.
- Go to the northwest locker room. Underground, head northwest into the locker room. Inside: Advanced Power Armor plus a pile of goodies including the Blue Memory Module, stimpaks and ammo. If you look like a recruit (no party, didn't spook Chris), the staff ignore you.
- Suit up immediately. Equip the Advanced Power Armor: +4 ST (your ST 4 → 8), the best damage resistance in the game, and heavy radiation resist. You are now a tank — and ST 8 means Slayer is unlocked later just by wearing this.
- Leave. Sneak back to the trap door and exit. Mission complete — you're armored decades ahead of schedule.
⚔ About that "good melee/H2H weapon" at Navarro
Navarro will not give you a melee weapon. It's an Enclave base — the arsenal is energy weapons and power armor, not fists and blades. What's actually here:
- Advanced Power Armor — the real prize. Grab it.
- Blue Memory Module + stimpaks, ammo, misc gear in the locker room.
- The legendary YK42B Pulse Rifle is an energy weapon and is not looted here — it's the Brotherhood's reward in San Francisco for handing in the vertibird plans (optional, and off-route for a melee run).
So bring your own H2H weapon: the Sharpened Spear (Melee) or Spiked Knuckles (Unarmed) you picked up early. Once you're in APA with ST 8, even those hit hard; upgrade to a Power Fist → Mega Power Fist afterward (New Reno, Sierra Army Depot, San Francisco) as you push toward Slayer.
🛍 Shopping in San Francisco (do it while you're there)
You're in San Francisco anyway to reveal Navarro (Step 0), and Navarro itself has no melee weapon to loot — so this is where you kit out. SF's Chinatown has the best-stocked shops in the game. Bring caps: sell whatever you looted on the way down first, because your Small-Frame carry weight is tight at this level.
| Merchant | Where | Useful stock for a melee Ghost |
|---|---|---|
| Red 888 Guns — Mai Da Chiang | Chinatown (SW building) | Power Fist & Mega Power Fist, Super Sledge, Spiked Knuckles; Combat Armor, Metal Armor, Combat/Metal Armor Mk II. Steep prices, restocks every 2–4 days. |
| Flying Dragon 8 — Lao Chou | Chinatown (general store) | Stimpaks, Super Stimpaks, Buffout, Mentats, RadAway/Rad-X, Healing Powder, First Aid/Doctor's Bags, skill books. |
| Brotherhood Outpost — Matt | SW Chinatown | Energy weapons & power-armor-tier gear — but the stock only opens after you hand in the vertibird plans. Nothing melee-specific. |
What to buy for the Ghost (unarmed)
- Power Fist → Mega Power Fist (Red 888 Guns) — the main pick. This is the top-tier unarmed weapon and SF is the earliest reliable place to just buy it. Grab the Power Fist now; upgrade to the Mega Power Fist once you can afford it.
- Super Stimpaks / Stimpaks (Flying Dragon 8) — healing for the Navarro run and everything after.
- Buffout (Flying Dragon 8) — optional, temp +2 ST; handy for scraping into ST-gated perks a touch early (stacks with the APA's +4 ST later).
- Mentats (Flying Dragon 8) — temp +CH for recruiting companions, +IN for dialogue checks.
- Bridge armor (Red 888 Guns) — a Combat Armor or Metal Armor if you want cover before you steal the Advanced Power Armor at Navarro. Optional — the whole point of the rush is to jump straight to APA.
✦ Optional Navarro extras (only if you want them)
| Extra | How | Cost |
|---|---|---|
| Vertibird plans | Get the plan quest, ask a tech who holds them, then tell Quincy "a tech sent me" (blame Raul for their rivalry) → he opens the locker. | Turn in to BoS in SF → Pulse Rifle + stat upgrades + ~25k XP |
| Tanker FOB | From the base Commander — Speech past his guard ("securing the tanker key"), or use the "cleaning crew" timing trick, then loot his locker. | Needed only for the endgame Oil Rig |
| K-9 companion | Get the quest from Dr. Schreber; take the K-9 Motivator behind Raul; use it on the dog. | A loyal robo-dog that won't alert the base |
These pull you toward the San Francisco / full-game loop. For a clean armor heist, skip them — just take the APA and go.
💪 Training Unarmed for free (quests & dialogues)
This is exactly why you don't tag Unarmed: its 30 + 2×(ST+AG) base is already high, and the wasteland is full of people who raise it for nothing. Following the trail south from Arroyo:
| Where | Who / how | Gain |
|---|---|---|
| Klamath (early) | John L. Sullivan — the drunk in the Buckner House bar; talk to him | +10% Unarmed (+10% Melee), no Agility cap |
| Sierra Army Depot (mid) | The punching bags in the training room — use each | +5% each (+4% if tagged) — two bags = +10% |
| New Reno (mid) | Win the boxing circuit to become Prizefighter | +5% Unarmed |
| San Francisco (late) | Lo Pan / the Dragon — help one in the duel, then take training | 4 sessions × +5% = +20% (up to 100%) |
| Arroyo / Temple (AG≤6 only) | Cameron and Lucas also train Unarmed — but only at Agility ≤ 6 and no combat skill tagged | Your AG-10 build can't use these |
▶ After the heist
Stop taking Outdoorsman perks. With APA on and ST 8, converge into the melee monster: Bonus HtH Damage, Bonus HtH Attacks, Living Anatomy, then Slayer at 24. Go buy a Power Fist / Mega Power Fist, recruit companions (Mentats to bump Charisma if needed), and the rest of the wasteland is trivial — you skipped forty levels of gear progression in one afternoon.